
There are a couple of ways to achieve this. I will show you two of my favorite ways.
One uses the selection tool and Gaussian Blur, The other uses the Alpha Channel and the Lens Blur. Don't worry if you don't know what these things are, I will be going over each step in detail.
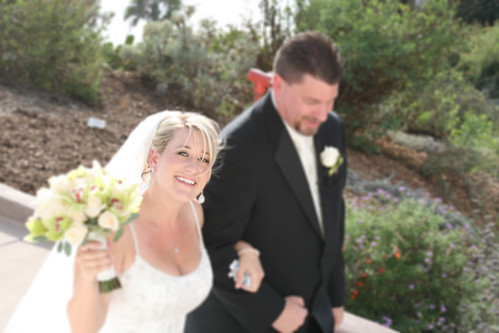
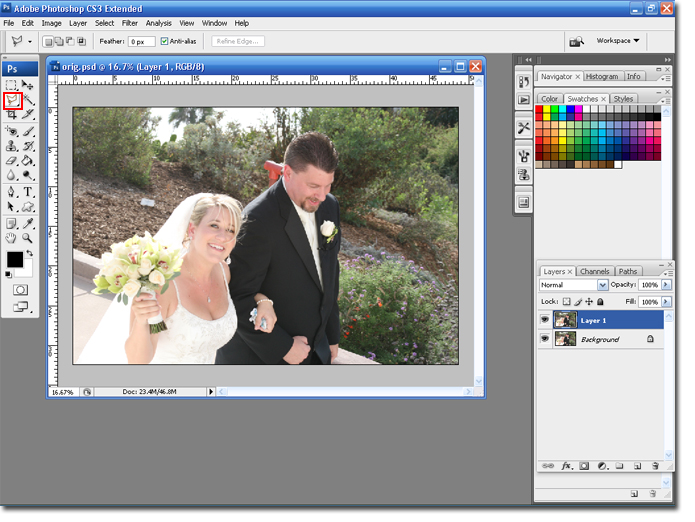
Here is my original Image

Type I
Type II

Section I: Alpha Channel Lens Blur
To make this easier on me (read: less typing) I am going to call this Type 1. I like to use Type 1 when I am only editing a small section of an image. It allows for more control over the image and it makes for a softer image, since I can make the blur fade in sections.
Step 1 Open you photo in Photoshop and duplicate the background layer (Ctrl + J).
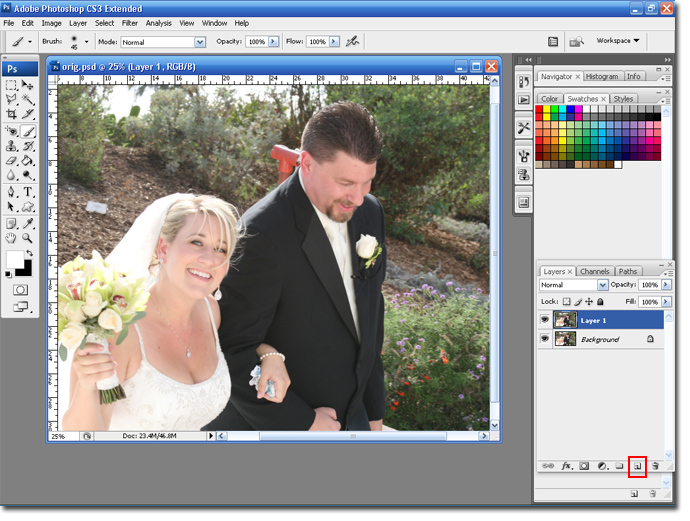
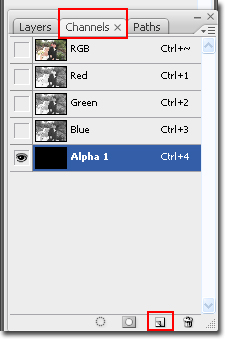
Step 2 Select the Channels link and create a new layer. This layer will be called Alpha 1.
Step 3 Click on the Eye icon next to RGB. Select a soft edge large Paintbrush tool, change the foreground color to White and change the Opacity to 50%.
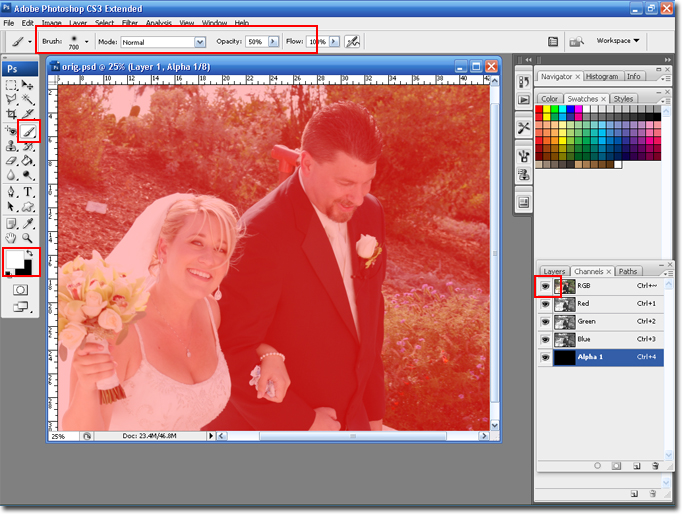
Step 4 Paint over the section that you do not want to be blurry. The lighter the section the less blurry it will be. There should be no blur over the eyes.
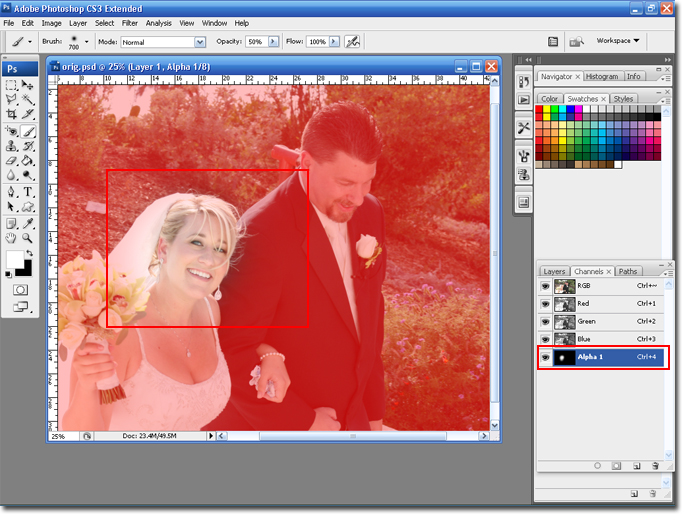
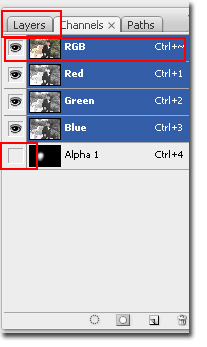
Step 5 Click on the Eye icon next to the Alpha 1 layer, this will turn off the layer. Highlight the RGB layer and select the Layers tab.
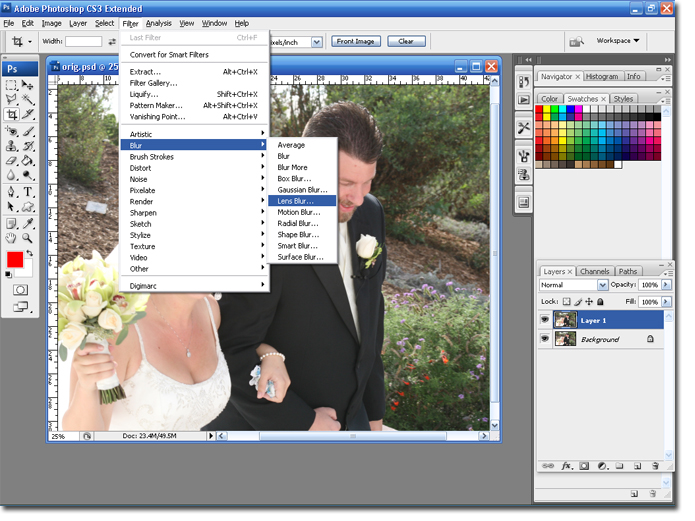
Step 6 Highlight the top layer and apply the Lens Blur: Filter > Blur > Lens Blur.
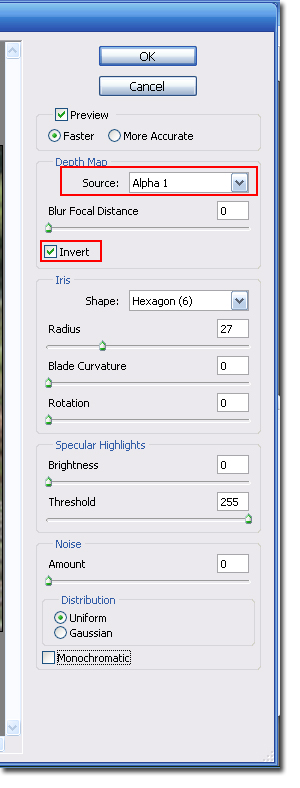
Step 7 Change the Source to Alpha 1, check the Invert box and change the Radius to the amount of blur you want. Click Ok to save the changes.
You are finished!
Section II
I like to use this type to edit a larger section of an image.
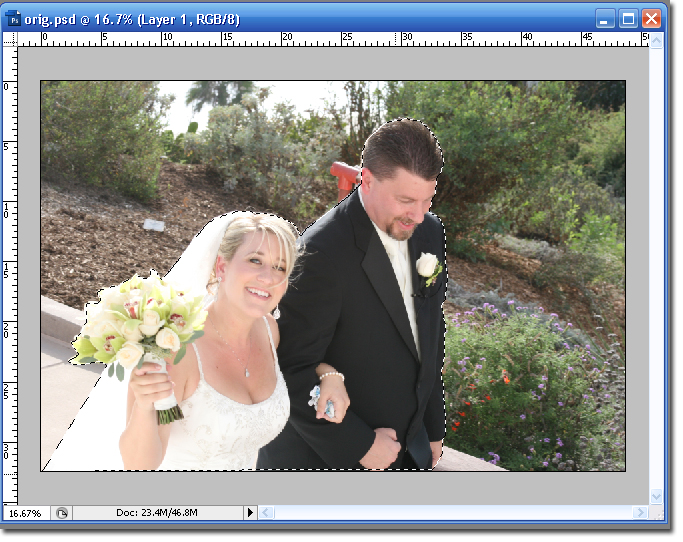
Step 1 Open you photo in Photoshop and duplicate the background layer (Ctrl + J). Select the Lasso Tool
Note: If you are more familiar with the Pen tool, it will work for this tutorial.
Step 2 Using the Lasso tool, select the area you do not want to be blurry.
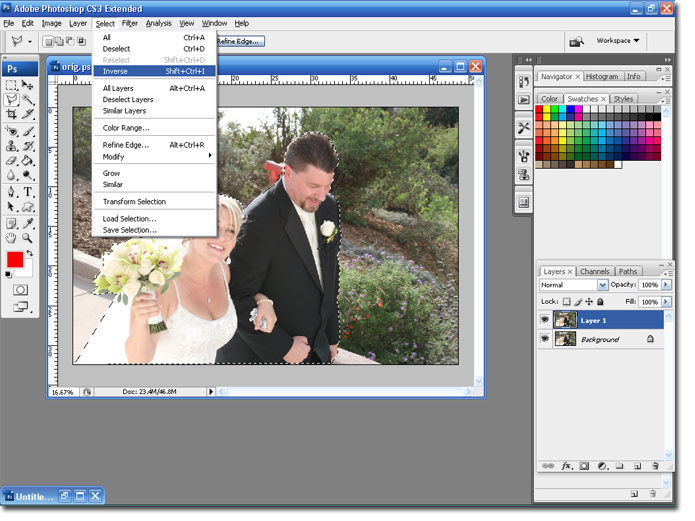
Step 3 Invert the selection: Select > Inverse.
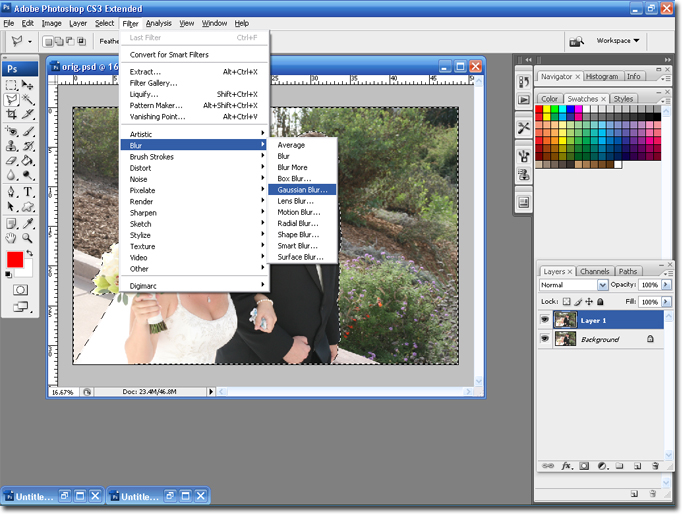
Step 4 Apply the Gaussian Blur: Filter > Blur > Gaussian Blur.
Step 5 Make sure the Preview box is checked so you can see the effect of the blur. Change the Radius Pixels to the amount you like. I used 10. Click Ok to save the changes.

You are finished!
Hope you enjoyed this tutorial and found it helpful.
Hugs,
BriannaNichole!
3 comments:
This stuff is totally greek to me, but I watched the hubs make a present for a friend the other night and its so cool to watch.
Wow, I am so happy I found your fab self! Thanks for taking the time to do your tutorials they are done very nicely and your style is so nice and comfortable I feel maybe a little more confident to try things. I learned so very much today, thank you!
so I finally got around to trying some of your tutorials. I am using GNU Image Manipulation Program (GIMP) because it is free and your tutorials are still perfect for this. Thank you so much!
Post a Comment