
So I am so in love with the Smart Object settings in Photoshop. I am not sure all they are used for, but I use them to create templates. They are super easy to use. Basically, you load your picture into Photoshop, convert it into a Smart Object and edit it to your hearts content. When you are finished you can just replace the picture with a new one. The new picture will have all the editing you did on the old one. This way you don't have to edit each picture separately.
The only drawback is that each picture needs to be the same size and resolution as the original photo or it will mess the picture up. Not that this is that big of a deal because generally all the photos you take are the same size and resolution. So I typically create one Smart Object template for landscape pics and one for tall ones.
I generally use this for color editing photos or adding filters (filters to make a photo brighter and whatnot) but you could use it to resize photos or anything else you could think of. Since my digital camera is kinda crappy I have been using it auto edit some of my recent vacation photos. I will post the auto settings at the end of this blog in case anyone wants to use them. They are super simple and really make a difference if you have an OK digital camera.
Smart Objects can also be used to resize a picture without it getting all funky. So its like when you want to make something bigger, but when you do it gets all pixelated. You can just convert the picture to a Smart Object and it will fix it for you. Click here for a step by step tutorial.
You can use Smart Objects in Photoshop CS3 and CS2, although in CS2 you will not be able to use filters for your Smart Objects. Here are some of the photos that I went in and edited. I am going to show how to apply the filters first, and what you can do with filters and then I will show you how to create the Smart Object template so you can apply it to all your photos. I am using Photoshop CS3, but you can do most of this in Photoshop CS2 and even in lower versions of Photoshop.
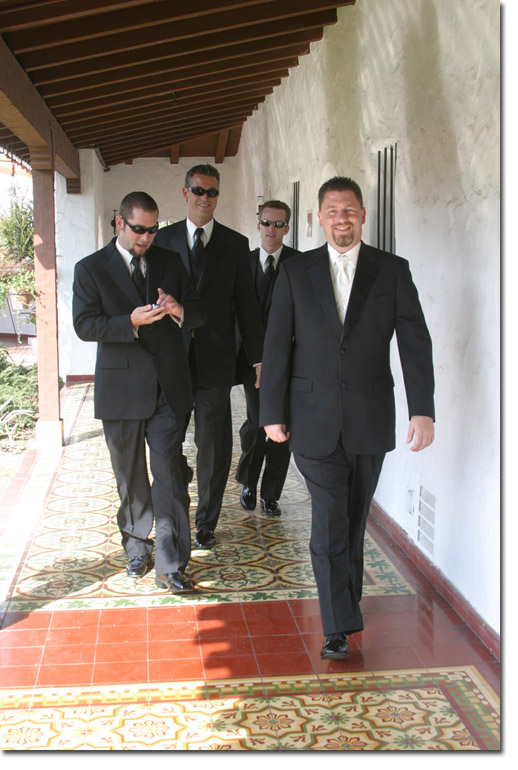
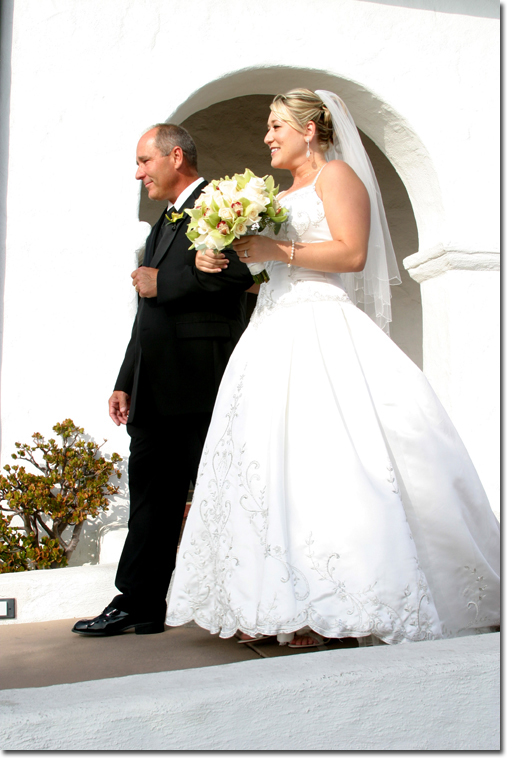
Here is the original photo I am using. You can see it is kinda dull. I will use several filters to give it some pop.
Here is how it will look when I am done adding the filters.

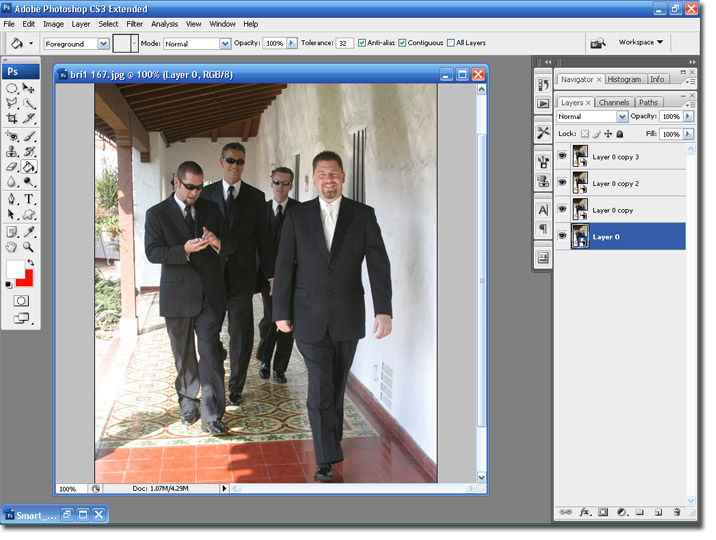
Step 1 Open the photograph. Right-click the background layer and select Convert to Smart Object. This will change the name of the layer to Layer 0 and there will be an icon in the preview.

By converting the layer to a Smart Object we will be able to replace it with a different photo and apply all the same filters.
Step 2 Click Ctrl + O, on your keyboard three time. This will duplicate Layer 0 three times.
Step 3 Click on the eye icon next to the top two layers (Layer Copy 2 and Layer Copy 3). This will turn off the layers so we can see the filter effect on our lower layers.
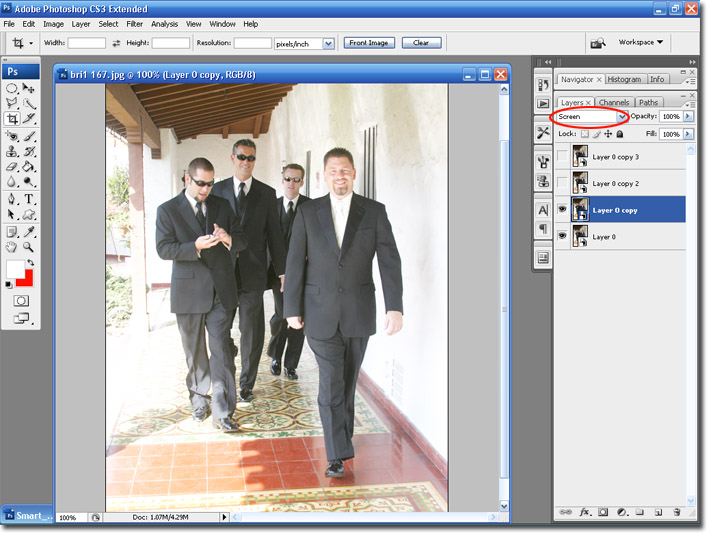
Step 4 Highlight the Layer 0 Copy layer and change the layer mode from Normal to Screen. Here is what my picture looks like with the Screen Filter.
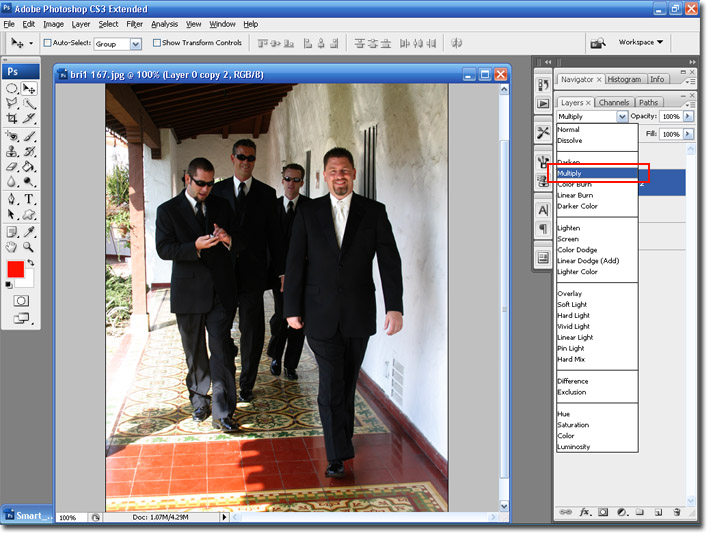
Step 5 Click on the eye icon next to Layer 0 Copy 2, this will allow us to see this layer. Change the layer mode from Normal to Multiply. Here is what my picture looks like with the Multiply and Screen filters together.
Step 6 Click on the eye icon next to Layer 0 Copy 3, this will allow us to see this layer. Change the layer mode from Normal to Overlay. Here is what my picture looks like with the Overlay, Multiply and Screen filters together.
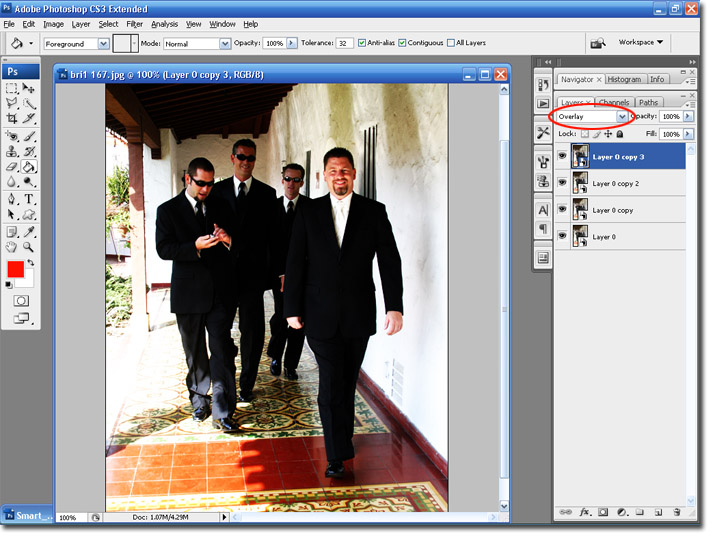
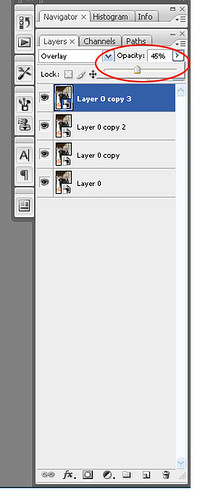
If the effect is too strong try lowering the opacity of the Layer 0 Copy 3 layer.
Once you have the picture just how you like it we can move on to the fun part.
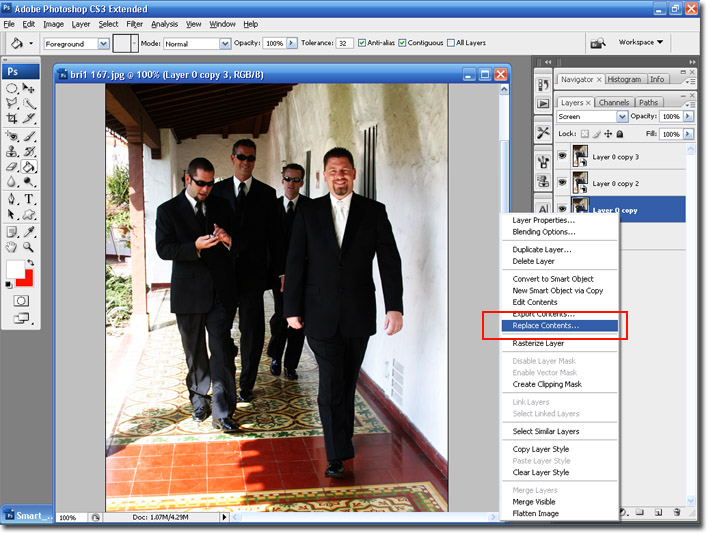
Step 7 Right-click on any of the layers and select Replace Contents and select another picture. Remember the picture must be the same size as our other picture.
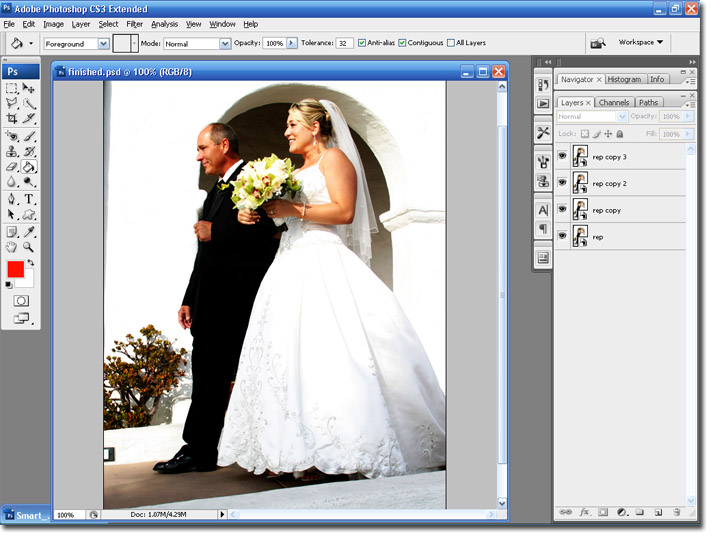
Notice the second photo has replaced the original and the layer names have been changed to the name of the second photo. If you don't like the effect on this picture you can continue to edit it from here.
2nd Original Photo:
Annnnnnd viola, you have the same filter effects from the other picture on your new picture. Try playing around with the Layer blend modes (Screen, Overlay etc.) and find new combinations that work for you.
I hope you all enjoyed the tutorial. Hopefully some of you found it useful or maybe just cool. Stay tuned for some more fun photoshop photo editing posts.
BriannaNichole!