
While I feel like it is no big deal to use actions, I am not ready to shell out $150.00 for them, not when I enjoy playing around with Photoshop. In fact, I was playing around with PS when I came across a way to create a similar effect to the Boutwell's Cinnamon Toast and Cinnamon toast B&W. In this blog entry I will show you how to 'warm-up' your picture. If you decide the tutorial is too hard you can always visit the TRA web site and pic up this action. If you don't want to spend the money, I can show you how to set up this tutorial as an action so you don't have to do the steps every time, this effect will just be a click away.
I like to call this effect: Warm it up Ted.
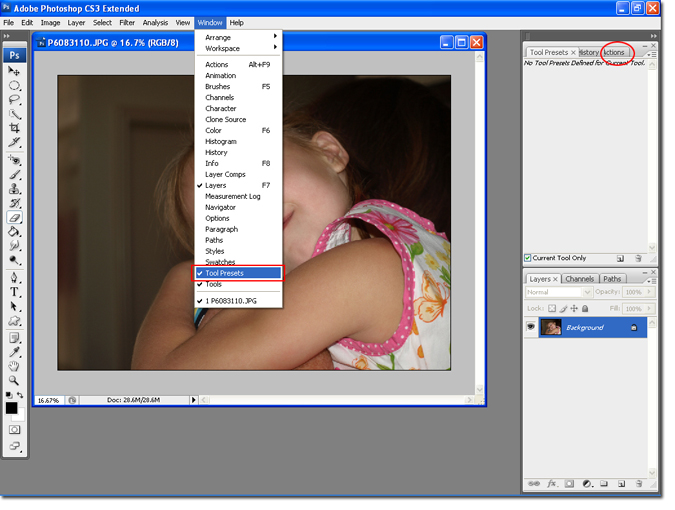
Step 1: Open your image in Photoshop and start recording your action (optional). Window > Tool Presets (make sure it is checked), then select the Actions tab.
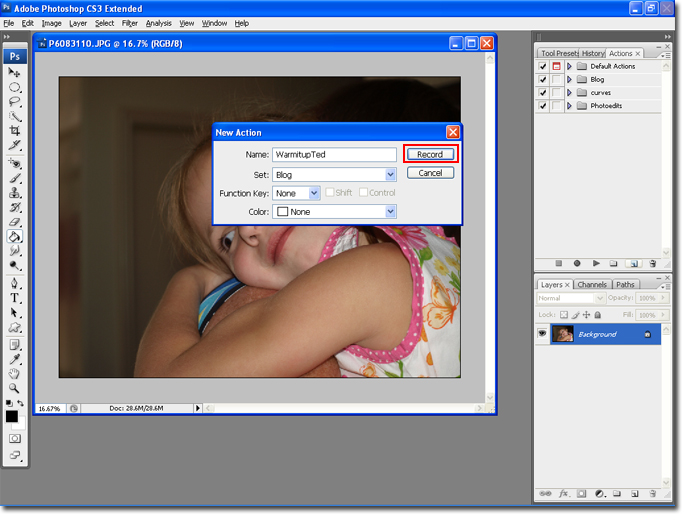
Step 2: Name the action and hit the Record button.
Step 3: Duplicate the background layer Ctrl + J and then select the Curves adjustment layer.

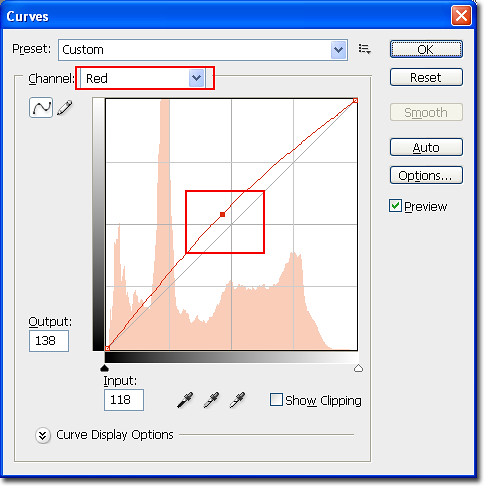
Step 4: Select the Red from the Channels drop-down menu and move the curve, in the middle, slightly up.
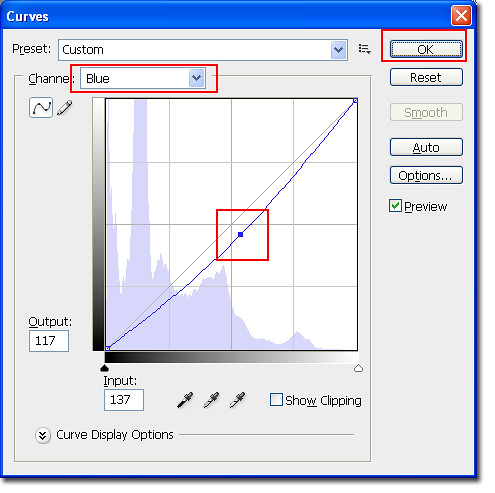
Step 5: Select the Blue from the Channels drop-down menu and move the curve, in the middle, slightly down. Click on the Ok button to save the settings.
You can play around with steps 4&5 to change the look of the effect. The move you move the curves the stronger the effect will become. If you don't like the look of the effect you can double-click on the curve adjustment layer to change the curve settings.
Step 6: Select Layer 1, open the Layers pallet Ctrl + L, and then put a number between 10-30 in the first box. Make sure the Preview box is checked so you can see the effect it has on your picture.

Click the Stop button when you are finished with the tutorial. This will stop PS from recording and future steps into your action.
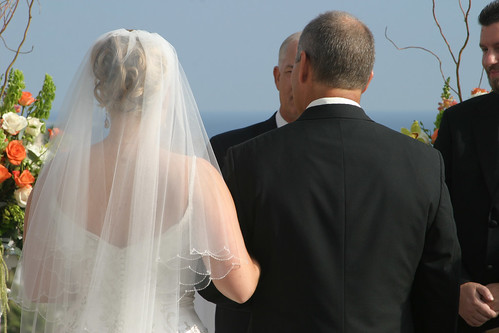
Here is our before picture:

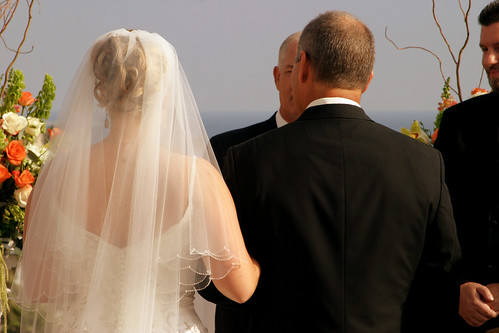
And our after picture:

You can add this tutorial to Black and White pictures as well. In the next steps I will show you how to add a black and white adjustment layer so you can see the Warm it up Ted effect on an B&W picture.
Step 7: Select Layer 1 and add a Black & White Adjustment layer.
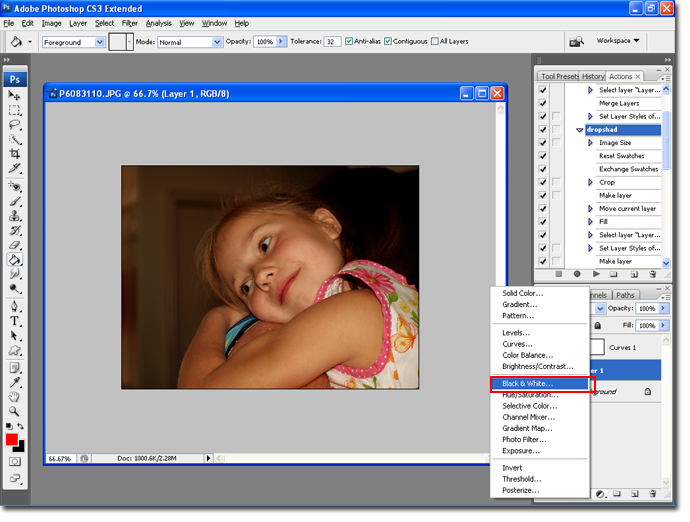
If you have an older version of PS you may not have this option. In your case select Layer 1, hit Ctrl + U and move the Saturation slider all the way to the left.
Step 8: Use the Preset drop-down to find the effect that you like best, and then click on the Ok button to save your settings.

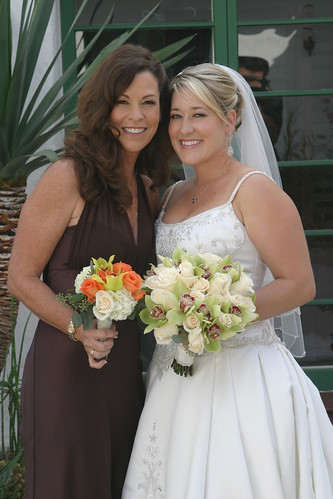
The picture should look like this now

Picture with the B&W adjustment layer and without the Warm it up Ted filter

To apply your new action to another picture follow the steps below.
Step 9: Open a new photo in Photoshop. Select your new action from the action list and click on the Play button.

Before Color
After Color
Before B&W
After B&W

I hope you enjoyed this tutorial and found it helpful. Please feel free to leave me a comment if you have any questions or you want to show some of your examples.
Hugs,
Brianna!
2 comments:
yeah - your blogging again.
I have to say...I LOVE YOUR DISCLAIMER!!!! LOL The hardest part of blogging is the spelling and grammar, for me anyway. I just may borrow your idea {{{wink}}} blogging would be so much more fun, teehehehe.
I have you bookmarked and will be visiting often. Love the photoshop tutorial here. I can use all the help I can get with this software. So far I have figured out how to add a watermark, LOL.
Sandy O
www.papertransformer.com
Post a Comment