I was going through some of the old pictures on my computer and I cam across come really pretty pictures. I took most of these with my old cell phone. It had rained earlier in the day and the sunset was just beautiful. The pics were taken from the front of my parents house.
The clouds look kinda funky in this picture, but it was taken with a cell phone camera.
This, and the one above, were taken facing the mountains. The rainbows were so pretty that day.
The sky almost looks like its on fire.
I think these next two are my favorite. They almost don't look real.
Ok, so I had to throw this picture in. This was the Valentines day right after I got engaged. I was trying to be artsy by putting my ering into the rose.
Hope you enjoyed the pics as much as I did,
BriannaNichole!
Sunday, January 27, 2008
Friday, January 25, 2008
Monogram & Wedding Related Stuff
Come check out my new blog Wedding Monograms! I decided to take all my wedding monograms, invitation stuff, etc. and create tutorials to help other brides. It will contain hepful web sites, vendor recs,tutorials and even fonts. Hopefully it will help some of you who want to go the DIY route.
Hugs,
BriannaNichole!
Hugs,
BriannaNichole!
Spot Color Photoshop Tutorial
TGIF all! I hope everyone is as excited for the weekend as I am. I had a crazy week where I had to do a day turn around trip to Fresno. Talk about exhausting! I am very happy to be back and even happier to be heading into a weekend.
Today I wanted to show you a very popular style for pictures. I call it Spot color, but its more of a way to add some focus or an artsy element to a photo. I have mostly seen this effect on wedding photos, but you can do it on any kind of a photo. Here is the effect I am talking about:
If any of you have ever been on theKnot then you have for sure seen this picture.
The effect is pretty simple. It basically consists of making a picture black and white and then removing the black and white from one section. This pulls your eye to the section with color. Its a nice artsy effect. Here is my original photo:
Here is the final result:
Step 1 Open the photo you wish to edit. Duplicate the background layer by hitting Ctrl + J.
Tip: I like to duplicate my background layer so I always have a copy of the picture that is unedited. That way if I make a mistake I can start over again.
Step 2 Click on the New Adjustment Layer icon and select Hue/Saturation.
Step 3 Move the Saturation slider to the left until the box says -100. This will take all the color from your picture.
Alternative Step If you want your photo to have a warmer or sepia look you can check the Colorization box and play with the Hue and Saturation settings. This will not give as strong as a contrast to the color, but it is a nice look. If you have CS3 you can use a black and white adjustment layer instead of of desaturating the photo.
My picture is looking a little dull so I am going to add some more depth to it.
Step 4 Hit the L key on your keyboard. In the box to the far left enter in a number between 1-100. For my picture I used 15.
Step 5 Highlight the top layer and select the Paint brush tool from the tool box on your left. Choose a soft edge medium sized brush. Make sure the foreground color is set to Black.
Step 6 Start painting over the section you want to be in color. When you are finished you can change the foreground color to White and paint over what you want to be black and white.
You are done! Here are some other pictures I have used this effect on.
Hope you found this tutorial helpful.
Hugs,
BriannaNichole!
Thursday, January 17, 2008
Best Dressing/Sauce Ever!
Two blogs back-to-back, sweeeeet! I just had to blog about the amazing dressing that my sister turned me on to. She had made me dinner with it and I had to try it. Its from Trader Joes, not sure if they sell it else where.
So I am sure there are lots of ways you can use it, but I used it a sauce on some chicken.
I got the chicken breast tenders and cooked them on the stove for until they were just a tiny pink in the center.
I added the dressing. You can eyeball it depending on how much chicken you are cooking.
After the dressing started to bubble I added about 2 large spoonfuls of sour cream. This helped cut the Balsamic taste and made it more of a sauce consistency.
annnnnd you are done. Sorry you will not get a formal recipe from me because thats not how I roll.
Here is my finished meal. Please excuse the inordinate amount of potatoes and the lack of veggies.
Enjoy,
BriannaNichole!
So I am sure there are lots of ways you can use it, but I used it a sauce on some chicken.
annnnnd you are done. Sorry you will not get a formal recipe from me because thats not how I roll.
Here is my finished meal. Please excuse the inordinate amount of potatoes and the lack of veggies.
Enjoy,
BriannaNichole!
Bless You.....ug
Dang I keep trying to think of how I can start this blog post and NOTHING is coming to mind. I keep starting to type stuff and then deleting it. I am feeling very non-witty today. Not that my blogs are ever witty, but I do try.
So I am really feeling the irony right now. I will give you the back story first, I was going to Terentino (sp) it but just because I really wanted to sound cool and say 'Terentino it'.
So this is back when I was with my EX and just friends with now Hubby. My now hubby sneezed and got really pissed at me because I didn't say bless you, or anything. I thought he was totally over re-acting and he should just get over it. See, I grew up with a dad who is a Jehovah's Witness and they never say bless you. In fact no one in my house did so it never seemed like a big deal to me. I went out with my EX and I was telling him the story about how my now hubby got all pissed at me for not saying bless you. To my shock my Ex totally agreed with him. He went so far as to say how it was really annoying to him. I think his exact words were; 'Yeah, I hate that shit'. Ummmm, really no one has ever said anything like that to me.
Ever since then, about 4ish years ago, I have made it a point to Always say bless you to people when they sneeze. In fact My mom even says it now!!!
Fast forward to now, I just moved into a smaller room at work, there are only three of us sitting together. The ironic part...none of my coworkers ever say bless you to me! I sneeze all the time, and I am always greeted with silence. Its totally not a big deal, it just really irritates me. Oh how things have changed.
Tuesday, January 15, 2008
Cool Pics Tutorial
I totally got inspired after seeing the amazing, wonderful, gritty pictures from a TTD (trash the dress) session. The lovely bride is Andrea, one of my nestie besties. All the pictures had this really cool washed out color feel that I loved. Check out some of Chris Austins pictures on his blog. BTW I think these are some of the same photographers that were at my TTD shoot. I have to say they must have improved because these pictures are just amazing! Oh and Andrea is the lovely brunette who is in most of the pics towards the end, she (and her hubby) are the ones on the motorcycle.
I guess this type of photography is called Lomo photography and you can get this same effect by using photoshop. There are a couple different ways that you can achieve this effect, however I am just going to show you my favorite way. It is also the easiest way IMO.
Like always I am going to use my of my wedding photos to create the effect. Here is my original photo:
The first step is to create the Vignette, this is the blackness around the edges that is standard for Lomo photography. If you don't like this effect you can always skip this step. You will need to have Photoshop CS3 or CS2 to create this effect using my steps. If you have an older version of Photoshop you can create a Vignette.
Step 1 Open the file you wish to edit. Go to Filter > Distort > Lens Correction.
Step 2 Under the Vignette section change the Amount and the Midpoint. Play around with the settings until you are happy with the result. Click Ok when you are finished.
Here is my photo with just the Vignette:
My picture doesn't have much contrast so I am going to boost it up a bit to give the picture some more depth. Skip step 3 if you are happy with your picture.
Step 3 Hit Ctrl + L to bring up the Levels adjustment menu. Enter 42 into the first box. If that is to dark for you either skip this step or lower the number. Click Ok when you are finished.
Step 4 In the layers pallet select the Channels tab. Highlight the Red Layer by clicking on it once.
Step 5 Go to Image > Adjustments > Brightness/Contrast.
Step 6 Change the Contrast to 50. I used 75, because my image was kinda washed out, but this effect may be too strong for your image. Click Ok when you are finished.
Step 7 Select the Green layer and follow the same Step 5 & 6, like we did for the Red layer. Make sure to use the same setting as you did for the Red layer, or the picture will look funky.
Step 8 Highlight the RGB layer by clicking on it once, and then select the Layers tab.
There you have it, the Lomo photography effect. Here is my finished image.
If you want the effect to look a little washed out you can always adjust the Hue/Saturation setting or play around with the filters. I hope you enjoyed the tutorial.
Kisses,
BriannaNichole!
Monday, January 14, 2008
My Dad is Too Cute
I just got this email (in Re to Bahama vacation):
This is out front of the house about 50 yards from the back patio. You walk down a sand path. The next palapa is about 200 yards away. The beach is about 2 miles long and it is just for the resort guests. If you rent a car you must leave it at the front gate. They give you a big golf cart to drive. If we go in November we could get a hurricane!
Can you handle this much fun???
Bahamas, Yes Please!
I must be the biggest spoiled brat that their ever was. My parents took my hubs and I on an amazing Hawaiian vacation to the lovely Garden Island of Kauai. Yes, I know I know I keep forgetting to upload some of the pics to my blog. It was just the best vacation ever. Hubs and I had a wonderful time on the vacation. We are thinking that it was a trip of a lifetime and we are not likely to go on another one for several years. So you can imagine my surprise when my mom called me this morning and asked if Hubs and I would like to go with them to the Bahamas!!!! I was trying not to squeal at my desk as my mom was explaining all the cool things about this vacation.
As soon as I asked my Hubby he was ecstatic, which I thought he would not be given that we are still paying off our last vacation. He said yes quicker than I could get the question out of my mouth and declares; "I have always wanted to go to the Bahamas". Since the vacation is not until November we will have some time to save up and maybe loose some weight.
So this is an Exclusive resort. My parents very, very generous friends offered them one of their timeshare weeks (1 of 6 must be nice). It will only be a about $500 per couple plus airfare and food. Not too bad for a super fancy resort.
Here are some pics from the web site:
Here are some pics my parents took on their last trip there:
My mom is so proud of her artsy-ness of this picture. She arranged the chairs and whatnot.
Overlooking everything. That cool thing in the water is a big ole bouncy thing to play on.
The place we are staying in...not to shabby
Don't hate me because my parents have cool friends ;)
Hugs,
Briannanichole
Sunday, January 13, 2008
Birdella.. or is it Birdela?
I have finally convinced my little sister to make her own blog MommyDenielle.blogspot.com. I think it would be a much better way for her to send out pictures and whatnot to people. So I hope you all check it out and give her a nice shout out for me.
BTW, make sure to notice the cool new header I created for her with my fab photoshop skillz.
Big ole fat hugs.
BriannaNichole!
Saturday, January 12, 2008
Waking Up @ 8:00am is SNTWTG!
For those of you not hip to the online lingo: Waking up @ 8:00 is So Not The Way To Go. I picked that little one after my oh so cool nestie bestie Cat.
But seriously, 8:00am after 5 odd glasses of wine Ugh! I do feel a little worse for the wear this morning, but I had an amazing time last night, even if my hubs did bail on me. I attend the Wine Tasting And Fondue party to benefit the Leukemia & Lymphoma society. Not only did I get to drink wine for charity, I also got to dip things in cheese and chocolate.......holla! My fav things in one place. I also got myself a fancy smancy prize in the raffle. All in all it was a great night filled with wine, fun, food, great conversation all for a really great cause. I hope we can do another event soon. Here are some of the pictures. If you didn't go you really missed out. So my digital camera pretty much sucks, but you are ok if you are taking pictures outside in the say time. If you want to take night time pics you are SOL. Ok, that is my disclaimer before you enjoy the pictures.
Some of our LA bestie nesties made it out for the event. We were so happy they were able to come down and join us.
Sharon's bunny ears next to some super tasty fondue.
A big thanks to Robert, Cat's man, for making all the fondue. He can really stir that cheese.
A big fat thanks to Cat and Robert for hosting the even at their super sweet pad.
Not sure where Cat was lookin in this pic.
Rachel, Steph and I.
Thanks everyone for making the evening so much fun. Good luck to all the marathon ladies.
Hugs,
BriannaNichole
But seriously, 8:00am after 5 odd glasses of wine Ugh! I do feel a little worse for the wear this morning, but I had an amazing time last night, even if my hubs did bail on me. I attend the Wine Tasting And Fondue party to benefit the Leukemia & Lymphoma society. Not only did I get to drink wine for charity, I also got to dip things in cheese and chocolate.......holla! My fav things in one place. I also got myself a fancy smancy prize in the raffle. All in all it was a great night filled with wine, fun, food, great conversation all for a really great cause. I hope we can do another event soon. Here are some of the pictures. If you didn't go you really missed out. So my digital camera pretty much sucks, but you are ok if you are taking pictures outside in the say time. If you want to take night time pics you are SOL. Ok, that is my disclaimer before you enjoy the pictures.
Some of our LA bestie nesties made it out for the event. We were so happy they were able to come down and join us.
Sharon's bunny ears next to some super tasty fondue.
A big thanks to Robert, Cat's man, for making all the fondue. He can really stir that cheese.
A big fat thanks to Cat and Robert for hosting the even at their super sweet pad.
Not sure where Cat was lookin in this pic.
Rachel, Steph and I.
I have to say I am the queen of taking my own pictures. For some reason I like the way they come out, maybe its the angle. Whatever it is I sure took a lot last night. Some worked, and some well not so much.
This one was a about 4 glasses of wine in.
Ummm
Ahhh
First half of the raffle prizes. There was so really cool stuff there. They did the raffle in a pretty cool way. There were cups next to each prize and you stuck the tickets only into the one you wanted. I thought it was cool because you were sure to get what you wanted.
Second half of the table.
The very pretty Jennifer and Rachel standing with me.
The purse and coat bed.
Usually it is my own boobs glaring at me from each picture, this time it was Mrs.50%'s turn.
It took me a few times to get Kate & her hubs picture just right.
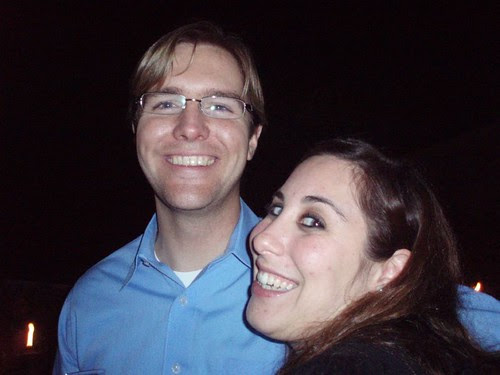
One....
Two....
Three...
I think I like three best, what say you?
This is what you get when you try night portrait on my camera :(.
Some of my fav neighbors. Thanks for the ride home Tim!!
Its sad that Jessica actually made herself shorter in this picture and she still is towering over me and my 4 inch heels. Maybe I'll get taller when I grow up.
Rachel's super cool tattoo. It says Loyalty and Betrayal upside down. Some girls just look so cute with tattoos.
Ahhh the fire pit was the best.
This has got to be the best picture of the night! I love me some Kim. Especially now that she is within spitting distance from me.
Claire gettin some picture time with Cat's hubby.
Cat, Andrea (USCGirl) and I.
Raffel Time!
Jessica did such a great job announcing all the prizes. She def. has the voice for it.
My blurry tickets. A big special thanks to Andrea's hubby for checking my tickets for me. You're my hero :)
YAY I won!! I had to take a quick snap as I went up the claim my prize.
I was so so so so so happy to get the gift certificate to the hair salon. I am in some need of some highlights. Plus now I get to try a new place.
All of MBOC's tickets. No wonder she won a crap load of stuff.
They also raffled the beautiful flower arrangements from Flower Allie.
Thanks everyone for making the evening so much fun. Good luck to all the marathon ladies.
Hugs,
BriannaNichole
Subscribe to:
Posts (Atom)